
Every Parted Magic release is published with an official ISO checksum, displayed in your account alongside the download. Verifying it takes under a minute and confirms two things: the file arrived intact, and it is byte-for-byte identical to the release we built. Do this before writing the image to a USB drive or disc — a corrupted download caught now saves a failed boot later.
A checksum (hash) is a fixed-length fingerprint calculated from a file’s contents. Change a single byte anywhere in the ISO and, as a result, the entire checksum changes. If the value your machine calculates matches the ISO checksum we publish, your copy is good. Whenever you run the commands below, replace pmagic.iso with the exact name of the file you downloaded.
Which ISO checksum algorithm to use
| Algorithm | Length (hex characters) | Notes |
|---|---|---|
| SHA-256 | 64 | Recommended. Use this one. |
| SHA-512 | 128 | Equally strong, if published. |
| SHA-1 | 40 | Legacy. Detects corruption, not tampering. |
| MD5 | 32 | Legacy. Detects corruption, not tampering. |
ISO checksum on Windows
PowerShell (Windows 10 and 11)
Nothing to install. Right-click the Start button, open Terminal or Windows PowerShell, and then run:
cd $env:USERPROFILE\Downloads
Get-FileHash .\pmagic.iso -Algorithm SHA256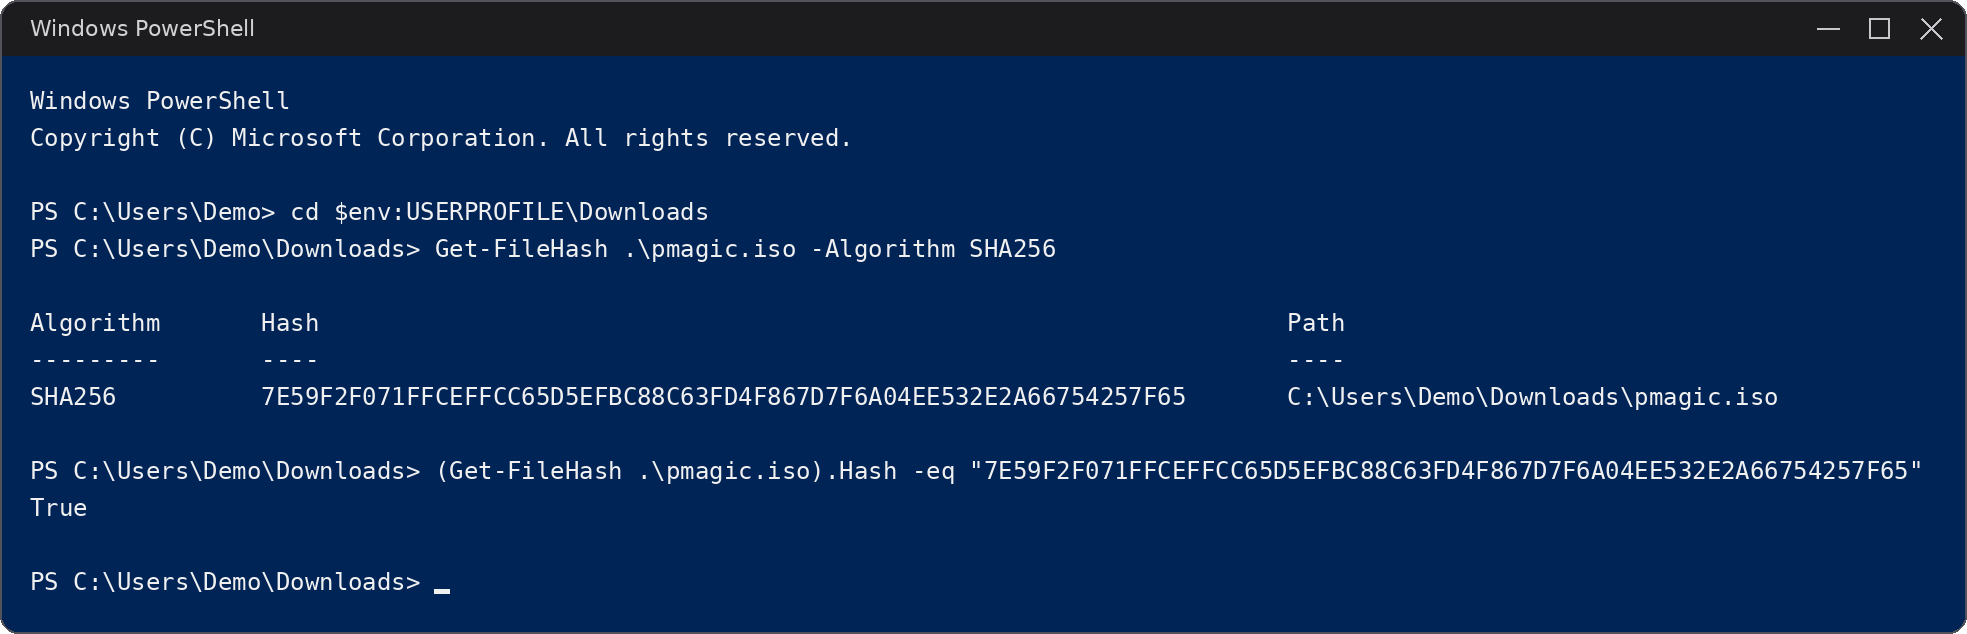
Once the command finishes, the value appears in the Hash column. Get-FileHash defaults to SHA-256, so the -Algorithm switch is optional; use -Algorithm MD5 for an MD5 value. To have PowerShell do the comparison instead, paste the official ISO checksum into this one-liner — it prints True on a match:
(Get-FileHash .\pmagic.iso).Hash -eq "OFFICIAL-SHA256-FROM-YOUR-ACCOUNT"Command Prompt (any Windows version)
If you prefer the classic Command Prompt, certutil is built into every Windows release back to Windows 7:
certutil -hashfile "%USERPROFILE%\Downloads\pmagic.iso" SHA256Swap SHA256 for MD5 or SHA1 whenever you need a different algorithm. Very old versions of certutil print the hash with spaces between byte pairs — ignore the spaces when comparing.
ISO checksum on macOS
Open Terminal (Applications → Utilities → Terminal) and then run:
shasum -a 256 ~/Downloads/pmagic.iso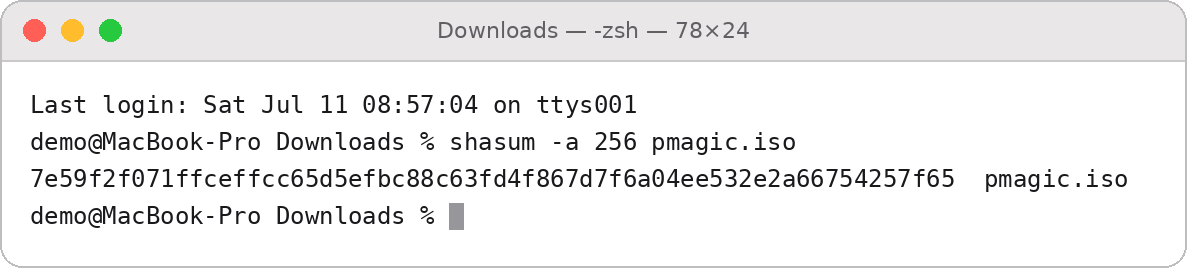
For MD5, use md5 ~/Downloads/pmagic.iso instead. To let the system compare the ISO checksum for you, run this from the Downloads folder — note the two spaces between the checksum and the file name:
cd ~/Downloads
echo "OFFICIAL-SHA256-FROM-YOUR-ACCOUNT  pmagic.iso" | shasum -a 256 -c
If you see pmagic.iso: OK, it matches.
ISO checksum on Linux
Every distribution ships the coreutils hash tools, so there is nothing extra to install:
sha256sum ~/Downloads/pmagic.iso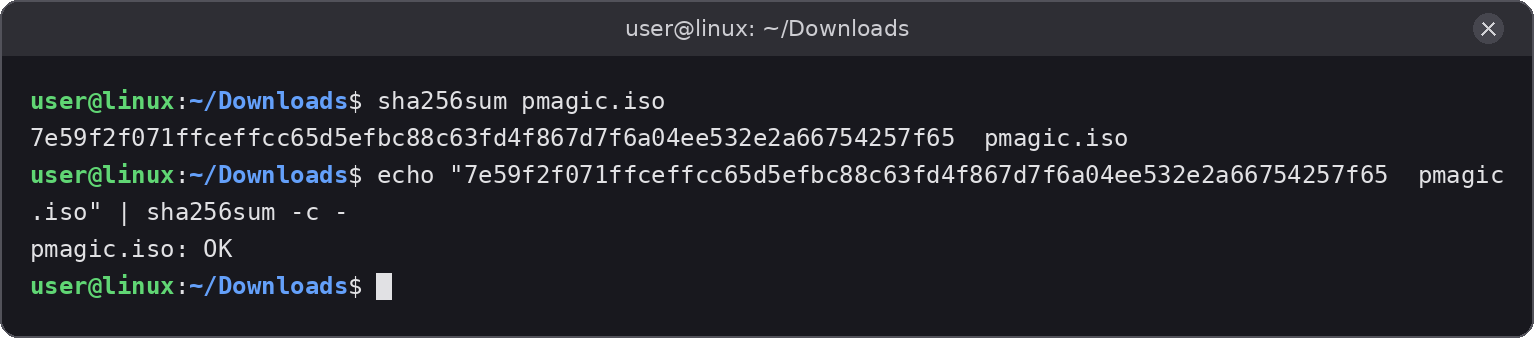
Likewise, md5sum and sha1sum use the same syntax. For an automatic ISO checksum comparison, again with two spaces between checksum and file name:
cd ~/Downloads
echo "OFFICIAL-SHA256-FROM-YOUR-ACCOUNT  pmagic.iso" | sha256sum -c -
If everything matches, the check prints pmagic.iso: OK.
Comparing the ISO checksum
Checksums are hexadecimal, so letter case never matters — a1b2 and A1B2 are the same value. Compare the entire string, not just the first and last few characters. The easiest method: copy the ISO checksum your machine produced, open your account where the official value is listed, press Ctrl+F (Cmd+F on a Mac), and then paste. If your browser highlights the published value, you have an exact match with zero eyeballing.
If the checksums don’t match
- Download the ISO again, because interrupted or silently truncated transfers are by far the most common cause.
- Also make sure you hashed the right file — the finished ISO, not a leftover
.partor.crdownloadfile. - Next, check the file size, since an interrupted transfer leaves a file smaller than the full ISO.
- Otherwise, try a different browser, or disable any download manager or accelerator.
- If a fresh download still fails, stop — do not write the image — and contact us with the ISO checksum you calculated.
Verifying a written USB drive
The published ISO checksum applies to the ISO file, not to a flash drive after the image has been written. Hashing the whole device will never match: the drive is larger than the image, and some tools modify the partition table as they write. However, on Linux you can verify a raw write (dd, Etcher, and similar) by hashing only the first bytes of the device, equal to the ISO’s size — replace /dev/sdX with your drive:
sudo head -c "$(stat -c %s pmagic.iso)" /dev/sdX | sha256sumRufus in ISO mode alters the image as it writes, so it will not match this way — use DD mode if you want a verifiable write. With Ventoy, the ISO sits on the drive as an ordinary file, so simply hash that file directly.
Quick reference
| System | SHA-256 | MD5 |
|---|---|---|
| Windows (PowerShell) | Get-FileHash pmagic.iso | Get-FileHash pmagic.iso -Algorithm MD5 |
| Windows (Command Prompt) | certutil -hashfile pmagic.iso SHA256 | certutil -hashfile pmagic.iso MD5 |
| macOS | shasum -a 256 pmagic.iso | md5 pmagic.iso |
| Linux | sha256sum pmagic.iso | md5sum pmagic.iso |